Art room hacks save precious time and money. And these days? We could all use a few extra bucks in our wallets. I like to say they’re “using your brain to do less work.”
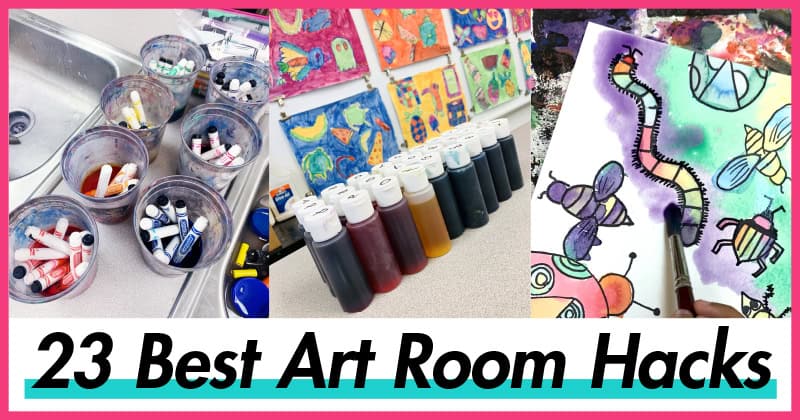
Teacher hacks are creative tips and tricks to make the act of teaching art easier. So whether you’re looking to repurpose a utilitarian item, organize your art room, or manage supplies, these art room hacks are the best!
23 Best Art Room Hacks for Elementary & Middle School
1) Cover unsightly areas or window wells with tissue paper blinds.
I’ve made these to cover windows for my basement-level art room my first year of teaching. I used blue tissue paper with white stars. It really brightened up a dreary room. And then again in my last art room to cover the ugliness of an air conditioner. I even painted the windows to block a concrete courtyard.
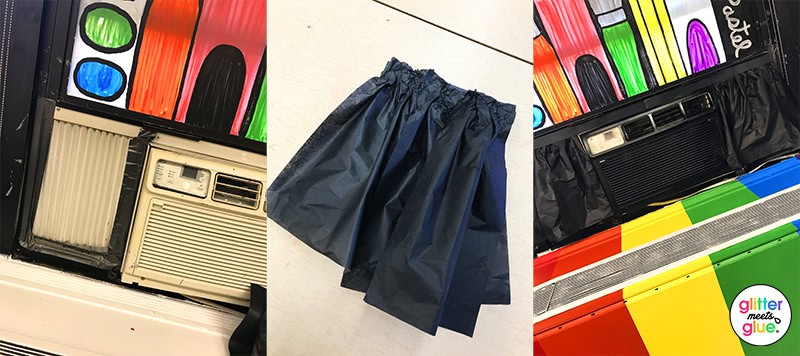
Simply cut a long strip of either condensed cardboard, bristol board, or tagboard to the length of the space to be covered. Next, hot glue the strip. And lastly, lay bunched up tissue paper on top.
2) Cookie sheets make awesome ink plates.
Cookie sheets as makeshift ink plates.
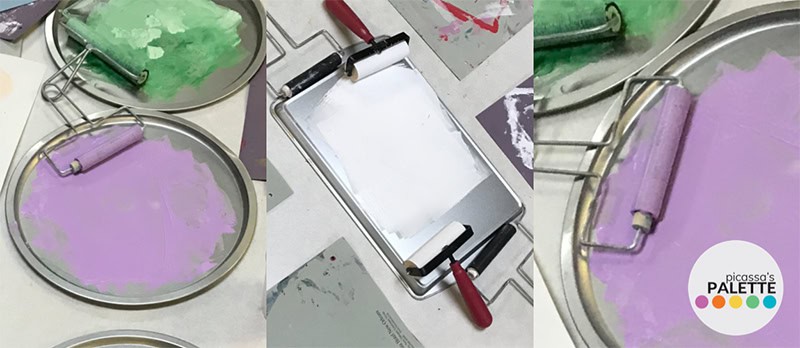
Aluminum cookie sheets from the dollar-and-a-quarter store provide students with a non-absorbent surface for loading brayers for basic printmaking projects.
WEBSITETPT STOREINSTAFACEBOOKPINTERESTThis awesome art teacher hack comes courtesy of Stephanie at Picassa’s Palette! She has a lot to say about teaching art over on her blog. And a boatload of awesome resources in her TPT shop.
3) Clean plastic paint palettes, knives, and cups overnight.
This is my favorite art room hack. Because art teachers already work hard enough. And I’m all about using my brain to do less work! Cleaning up after painting is a drag.
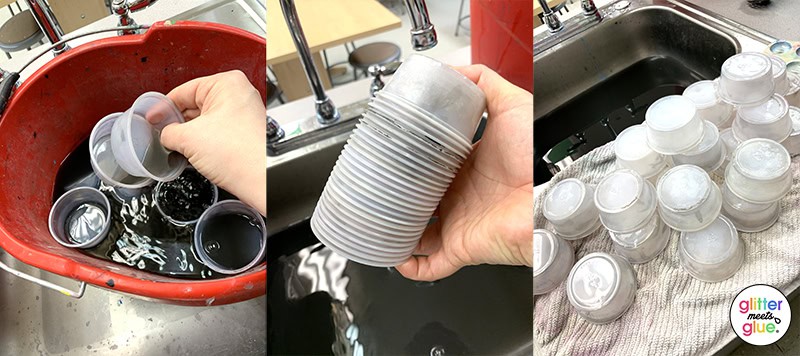
At the end of a painting lesson, I take all the plastic-y things and soak them in a bucket of hot water. Bonus points for throwing a towel on top to keep it warm in there.
The next morning, I dump the water and refill it, putting any of the remaining somewhat dirty cups in there for a little bit. They always have water in them. So I stack them, give them a swift shake, and then line them up on a towel to dry.
4) Measure cardboard or styrofoam loom notches at the same time.
Whenever I have to measure a bunch of looms to create notches, I do large batches simultaneously. It saves a boatload of time!
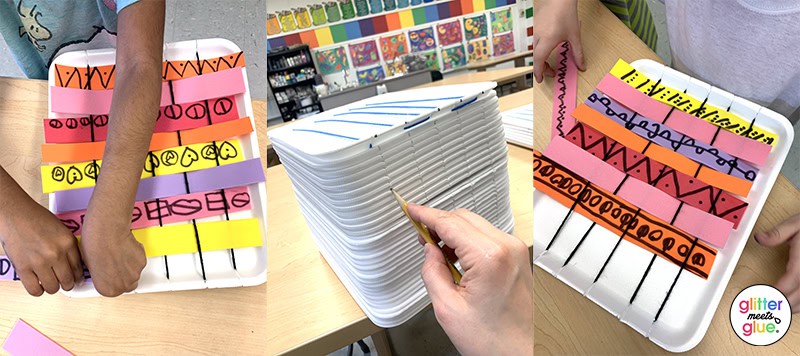
Simply measure where you want the notches on one cardboard or styrofoam loom. Then, stack up a bunch and either free-hand or with a ruler, mark all the other looms down the side. On styrofoam, I use pencil because marker bleeds.
5) Hand-color your prints!
Keep printmaking quick and easy by having students print with one color. After the prints are dry, hand color the prints using colored pencils. The colored pencil texture blends beautifully with the printed ink texture.
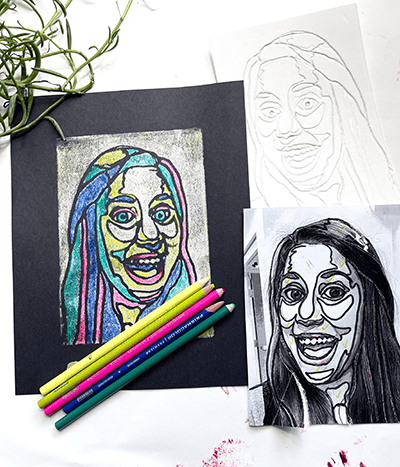
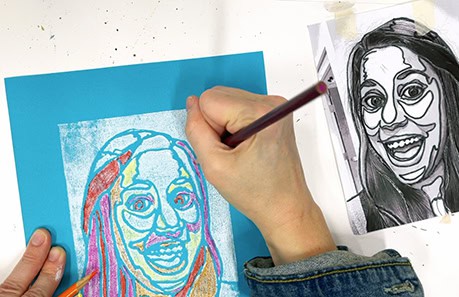
PRO TIP: Stick with white ink when printing to keep the colored pencils bright!
WEBSITETPT STOREINSTATIKTOKFACEBOOKPINTERESTIf you’re a high school art teacher, you’ll want to check out Whitney Panetta at Look Between the Lines! There you’ll gain lots of insight about all things photography, mixed media, and digital design.
6) Fast food trays are an insanely versatile art room hack.
If you don’t own some plastic fast food trays, get some quick. They come in handy for so many things in the art room. Use them to pass out and collect supplies and projects, stack materials for the day’s classes, roll ink for printmaking lessons, and more.
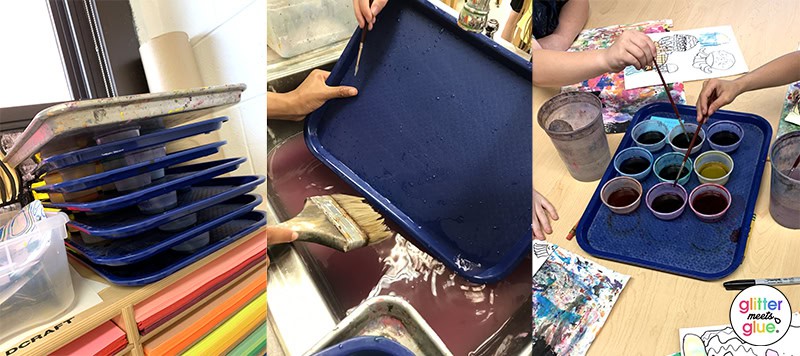
They are relatively cheap on Amazon. Baking trays also work so long as they have a rimmed edge.
7) Moisturizer fixes squeaky paint rollers.
File this one under “I’m too cheap.” But I try to limit spending money on consumables as much as possible. That includes paint rollers that I use for some printmaking lessons. The problem is after awhile, if they’re not cleaned out well enough, or too much rust forms on the metal handle, they start to squeak.
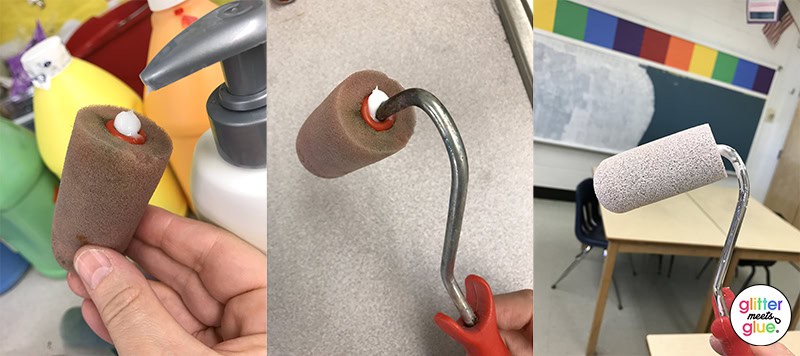
Remove the roller. Squirt a blob of moisturizer on the end. And then insert the handle back through the roller. All the squeaks are gone!
8) Magnetic photo frames make organizing your space easy and flexible.
I order the 4×6 size in bulk and have a variety of uses. They are perfect for labeling my metal cart of table supplies. Maximize student helpers by providing visual cues for where things belong.
Another use is to have a magnet for each supply needed for the day. It can be a fun diversion for students asking “What are we doing today?” or “Are we painting today?” when they enter your room. You can simply point to the board and let them see if they can figure it out before class starts.

If you are required to post your standards, objectives or “I Can” statements, print your most utilized options and slip them inside the frame. When not in use I stick them on the side of my filing cabinet. You can also slide some info inside and write on the clear sleeve with dry erase markers.
WEBSITETPT STOREINSTAFACEBOOKPINTERESTThis helpful tip comes from Melissa of The Speckled Sink. She’s an experienced art teacher with lots of great ideas she writes about on her blog. Be sure to click over to read more about how to organize and distribute paint. Perfect for back to school!
9) Pool noodles help with a slouching drying rack.
Even with drying racks that are designed not to sag, sometimes the shelves will slouch, making it difficult to put things on them. Annoying, right?
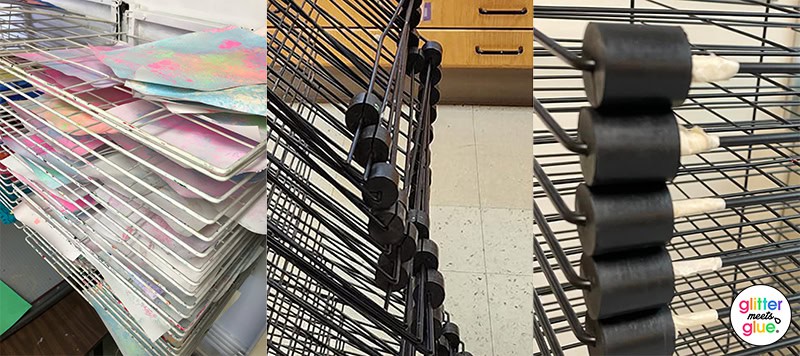
Try using either styrofoam stoppers or pool noodles to keep them separated. It’s important the noodles overlap one another. Adding a piece of masking tape helps keep them in place.
10) Time & Money-Saving Tips by the Sink
Keep Clay Cracks at Bay: I always keep a spray bottle of water handy when working with clay. If a student starts getting fine cracks in their clay (from their hot little hands), I just mist it and let the water soak in.
Fight Grease and Sticky Fingers: Fast Orange hand cleaner & degreaser is great for oil pastels and other greasy messes. Plus, it also just smells fantastic!
Free Tissue Alternative: Are you tired of spending money on tissues only to have students fake-blowing their noses just to get out of their seats? Skip pricey tissues and give them toilet paper instead. It still works, and students aren’t as excited about using it. BONUS: you can usually get toilet paper remnant rolls for free from the custodian (until the other teachers catch on)!
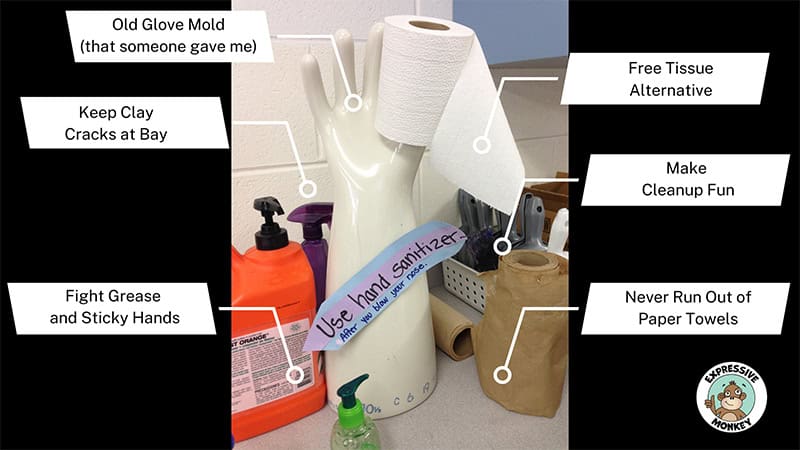
Make Cleanup Fun: Do you want to see students get excited about cleaning up? Reward a few students who are cleaning up quietly with whisk brooms and dust pans, and watch them go to town!
Never Run Out of Paper Towels: Custodians are usually happy to give you the remnants of old paper towel rolls so you never run out!
WEBSITETPT STOREINSTAFACEBOOKPINTERESTYOUTUBEThis list of fabulous hacks for in and around your art room sink comes from Stacey Peters of Expressive Monkey. She recently started a new venture called, “Mindful Drawing Studio” where participants learn to doodle, de-stress, and gain focus.
11) Dying markers are great for shading.
Tossing dying markers into the trash is a complete waste. They still have ink in them and can be used for coloring and shading! Look for markers that are newly drying out, not completely dead. Hold them like you would a crayon. They’ll have a crayon-like texture on the paper.
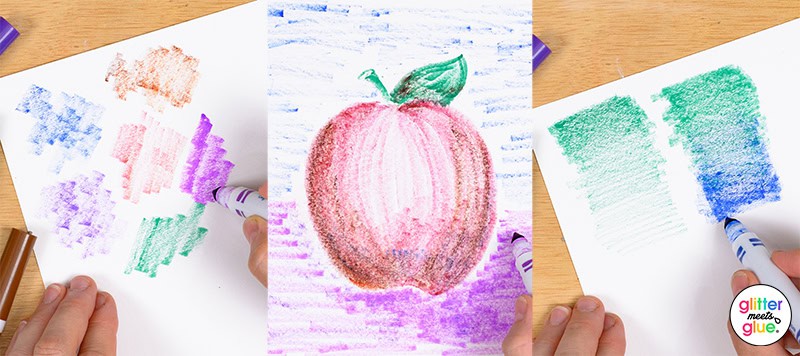
Ever run out of shading pencils for an entire class? Need something quick and cheap to practice shading with so you don’t use up the good pencils? Have kids that always want to erase? Problems solved.
12) Shower curtains hide all the mess!
Do you have an unsightly open cabinet that you’d like to cover? A colorful shower curtain might just do the trick!
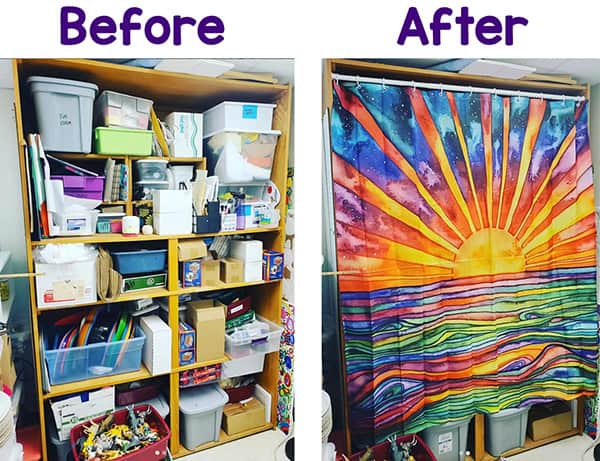
I had this very large shelving unit that was very ugly and cluttered. I spent one short afternoon putting up a tension rod and vibrant shower curtain and now that area looks attractive and colorful. Super easy and affordable fix.
WEBSITETPT STOREINSTAFACEBOOKPINTERESTThis fabulous tip comes courtesy of Marcia Beckett of Art is Basic. Hop over to her website to read more of her helpful art teacher tips for bulletin boards, art room organization, and her amazing art projects!
13) Dead markers make the best watercolor paints.
Stop throwing away dead markers. Give them a second life by soaking similar colors in water to make your own paint. Then, use them to do marker painting!
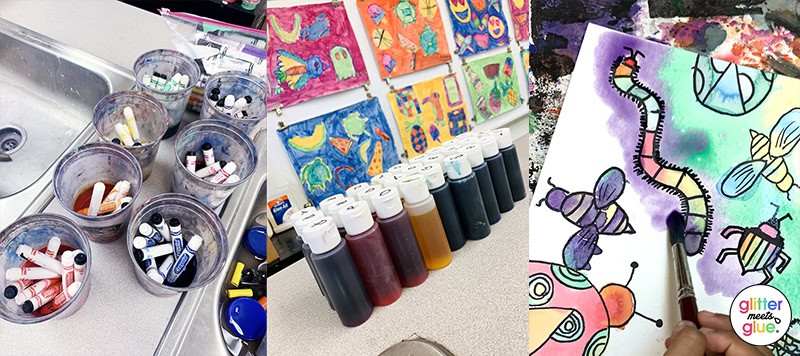
Simply pour them into squirt bottles and add a few drops of isopropyl alcohol. Store them away from the sun and they’ll last a long time.
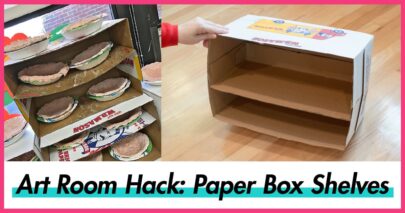
14) Copy paper boxes make great shelves.
Anyone else have a small art room? I love doing 3D projects. But there’s no place to store them while they’re drying. So I made these copy paper box shelves in a snap. This is one of my favorite art teacher hacks!
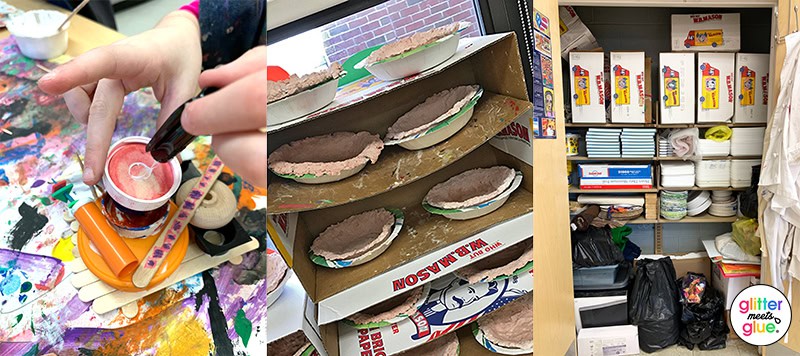
Check out my tutorial on how I made mine. When not in use, I put them in my closet and store art materials and projects in them for the art show. Now that’s the best art room hack!
15) Keep sharpeners, basic supplies, and a bowl for pencil shavings in arm’s reach.
A practical suggestion for teachers is to position a bowl at the center of each table for collecting pencil shavings. This straightforward addition can improve classroom organization by enabling students to sharpen their pencils without creating distractions.
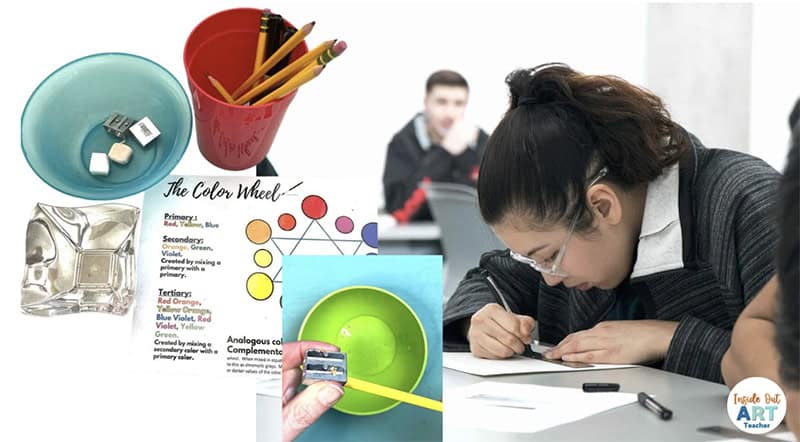
Placing the bowl within easy reach allows students to remain at their desks, minimizing the need to move around the classroom, which frequently causes interruptions.
This minor modification helps maintain classroom cleanliness and fosters a more seamless workflow, contributing to a better learning environment for all participants.
WEBSITETPT STOREINSTAYOUTUBEPINTERESTThis very useful tip comes directly from Lauren Bohrman of Inside Out Art Teacher. She’s an 25 year veteran, high school art teacher who shares lot of engaging art project ideas on her blog. Be sure to check out her bottle galaxy drawing project!
16) Cutting paint gallon jugs makes getting out paint easier.
At some point, the paint runs out. Or does it? Like a bottle of moisturizer, acrylic and tempera paint can be hard to get out every last drop. Many resort to watering it down. I’m not a fan of that.
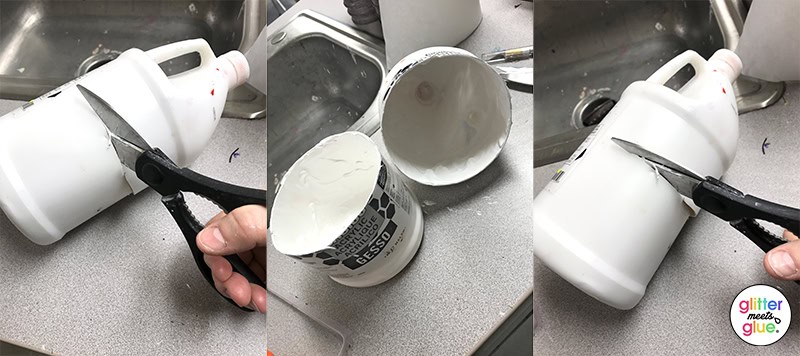
Instead, I like to use a mat knife or razor blade to make a small incision. And then insert a pair of heavy duty scissors or shears into the slit to cut the container in two. From there, the paint comes out real easy!
17) Cut yarn for weaving projects all at once.
Some art projects require a lot of teacher prep. Weaving is one such case. But there’s a way to make cutting the yarn much quicker. And all you need is one good arm and a sharp pair of scissors.
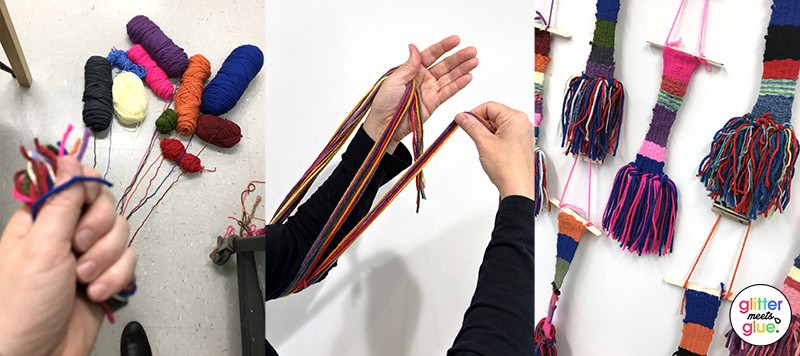
Line up the ends of roughly 10 different skeins of yarn and clasp them under your thumb. Then begin wrapping the yarn around your palm and elbow many times. While continuing to hold the yarn in your palm, slip off the yarn from your elbow. Lay it on a table. Then cut the yarn where you palm was holding it.
18) Assign supplies to students for the entire semester.
I found that basic supplies work better when handed out to each student. Students take more ownership of their materials if they have control over keeping them nice and storing them. The trick is that they should be small enough to fit in the box.

I gave each student a Box Supply Case from Dick Blick to store their brushes, pencils and pens.
WEBSITETPT STOREINSTAFACEBOOKPINTERESTYOUTUBEThis great tip comes from Sabrina Wingren of “A Space to Create Art.” Sabrina is a former high school art teacher with prior experience as an Art Director. Check out her blog for lots of art project ideas!
19) Art room hack: less is always more.
In the elementary art classroom, one effective hack for teachers is to focus on a limited selection of versatile supplies, teaching students the myriad ways they can be used and combined for extraordinary results. Staples like wax crayons, oil pastels, felt markers, and watercolor paints are not only affordable but also remarkably flexible in the hands of young artists.
For instance, wax crayons can be used to create a resist effect with watercolor paints, while oil pastels offer a vibrant contrast when used alongside markers. This approach not only simplifies supply management but also encourages students to delve deeply into the potential of each medium, fostering a deeper understanding and appreciation of their unique properties.
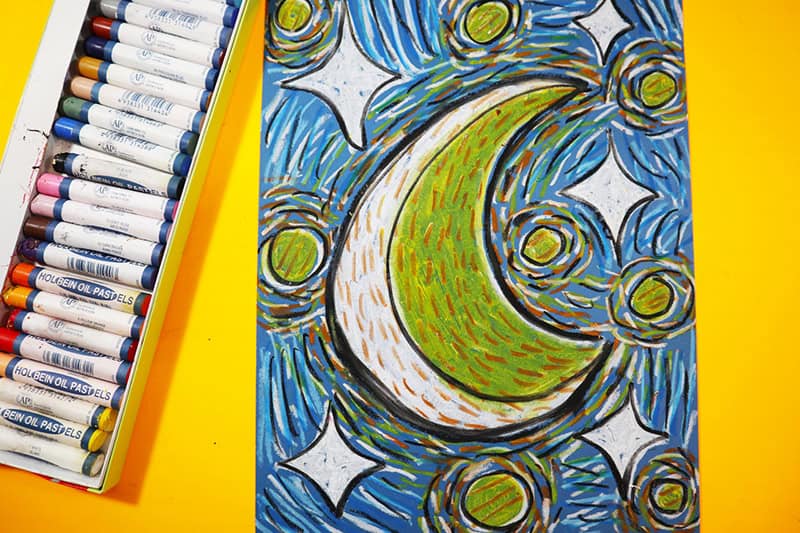
Additionally, integrating art history into these projects can enrich the learning experience. A great example is the Vincent van Gogh Art Lesson Plan, which uses oil pastels and watercolor paints. This lesson plan not only guides students through creating stunning moon artworks but also introduces them to the works of van Gogh, blending practical art skills with art historical knowledge. Such lessons demonstrate how, with a few simple supplies, art teachers can inspire their students to create masterpieces while connecting them to the broader world of art.
WEBSITETPT STOREYOUTUBEINSTAFACEBOOKThis fun tip is directly from the ever-exuberant Kathleen McGiveron of Ms. Artastic. Be sure to check out her podcast and YouTube channel for lots of ideas on teaching elementary art!
20) Condiment cups are great for everything.
Condiment cups are one of the most well-used items in my art room. And one of the most useful art room hacks!
Of course, they’re great for managing paint distribution. But you know how watercolor paint trays always get messy with the littles? Pop each out and drop them in a cup. Add water. Easy watercolor paints!
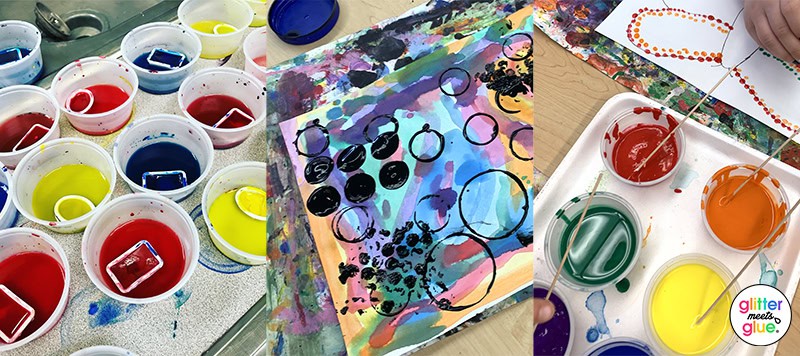
Beyond paint, I use them in printmaking lessons, too. Dab the lids in paint and press to paper. Instant circles. Plus, use them to hold gems, beads, and other small items during craft lessons.
21) Store paintbrushes in tubes!
This hack requires extra funding, but it’s worth it! Grab paintbrush tubes from Blick (or order a similar product for cheaper from Uline) for each student. Assign one paintbrush tube per student with a set number of brushes in the tube.
Check the brushes at the end of the course for a project grade for caring for their brushes during the course. If the student needs to replace their set, by all means, as long as they are equivalent in quality and size they will get credit if replaced. With this system, you will be able to use the same brushes year after year.
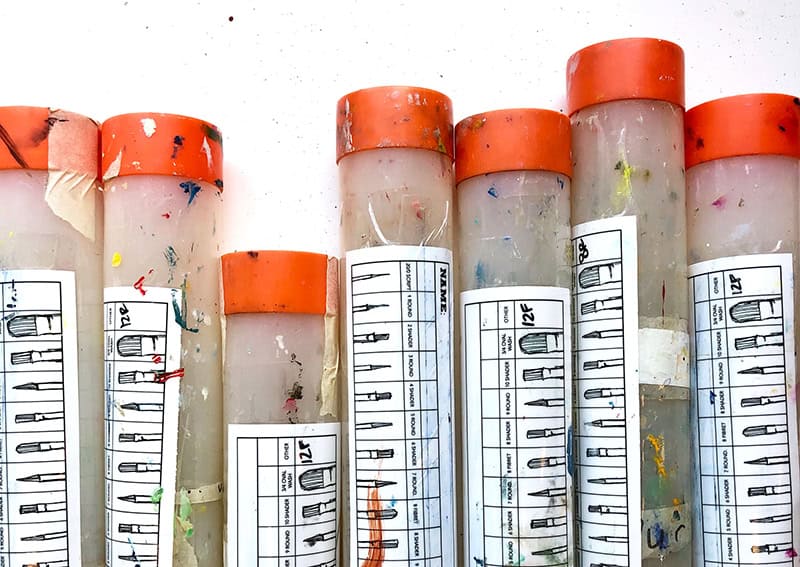
PRO TIP: start purchasing brush tubes as your budget allows working from the advanced level courses down to the intro level course.
This is another great tip from Whitney at Look Between the Lines. Check out more art classroom hacks for secondary art classes over at her website!
22) Taping the backside of burlap stitching projects reduces fraying.
Kids love to pick at things. I imagine they’ve all been hens in their past lives, picking and plucking at everything. That includes the ends of burlap.
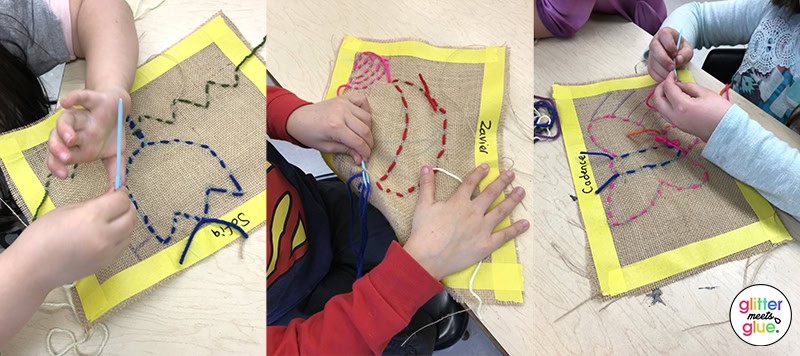
To prevent kids from pulling out the threads when doing stitching projects, run 1-inch masking tape around the back on all 4 sides. This will not only prevent fraying. But it’ll also stop students from stitching too close to the edge. And, it’ll give you a place to write their name.
23) Hand lotion + Model Magic works wonders.
Many people don’t know this trick, but it’s something we discovered by chance in my classroom when kids were using hand lotion and Model Magic at the same time. If your Model Magic is starting to get cracks and become dry while you are working with it, you can put a very small amount of hand lotion on your hands and mix it up.
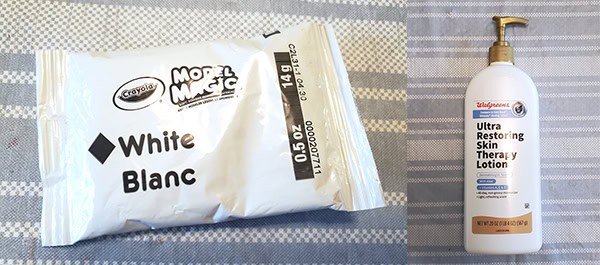
The Model Magic will become softer and stickier. This also helps the Model Magic to stick to itself better. Any hand lotion should work. This won’t work if the Model Magic is completely dried up.
This is yet another really helpful tip from Marcia Becket! For some fun ideas to use Model Magic, check out these blog posts (including Model Magic insects and spider webs) by Art is Basic.”
Got an Art Room Hack to Share?
Did any of these art room hacks help you with how to save time and money teaching art? Do you have any tips you’d like to share with others? Drop a comment below. I’d love to hear more!



Amazing tips, Thank you =D
great tips
Thanks so much for sharing your great tips!