


Elements of Art and Principles of Design Booklets
Let’s be real. Teaching the elements of art and principles of design to elementary and middle school kids can be boring. Not to mention challenging to recall, if art is only once a week. Worksheets are not inspiring or engaging, either.
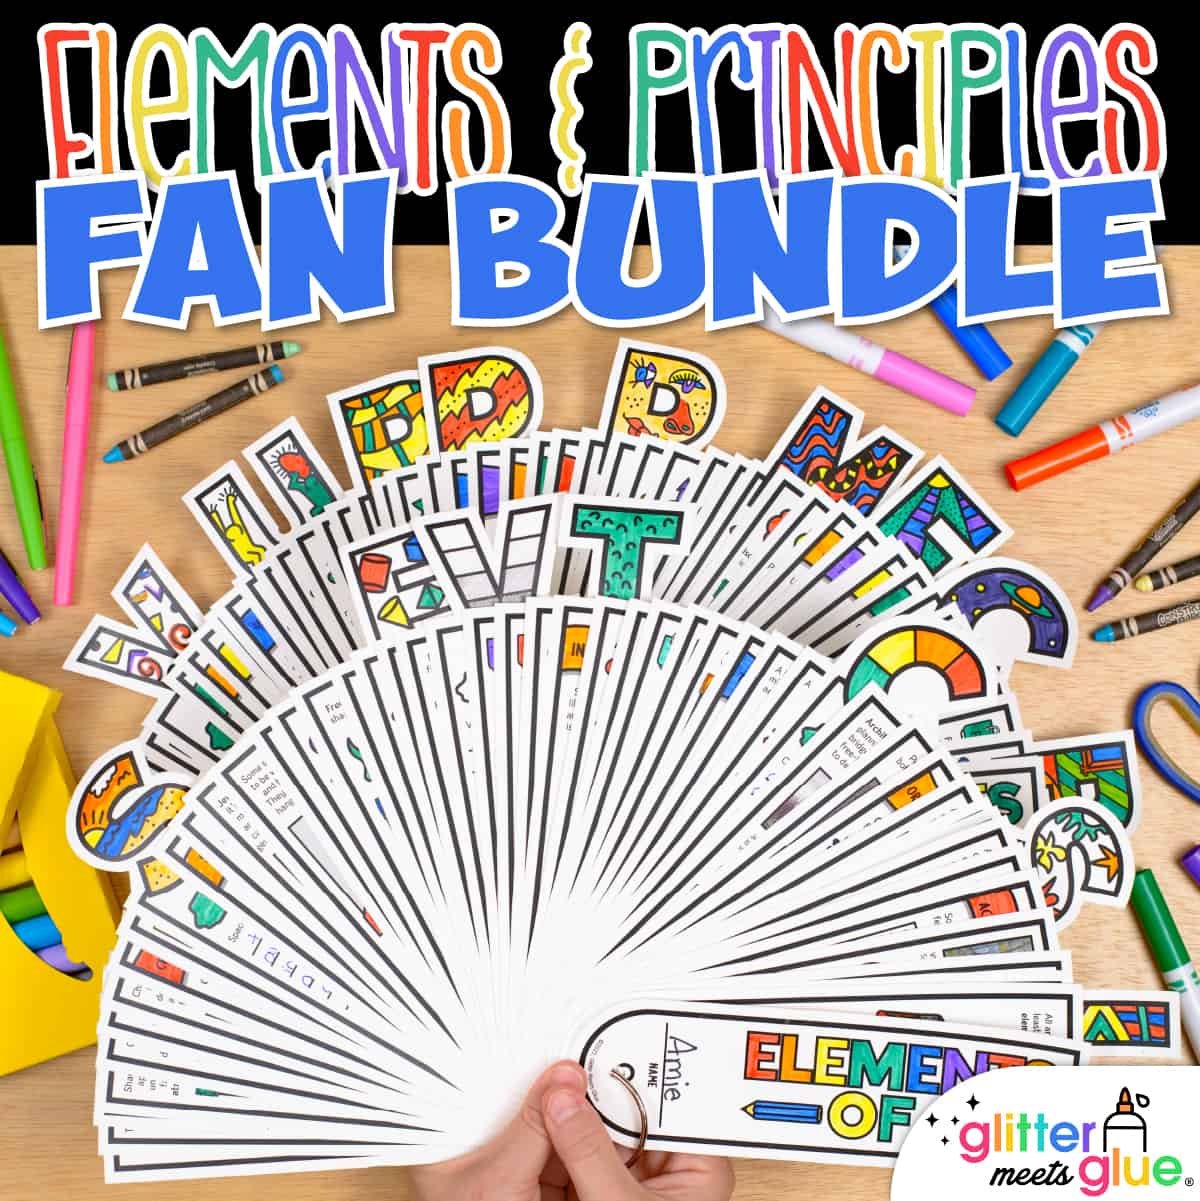
But what if you had a way to make it simple, painless, and dare I say fun? This Elements & Principles Interactive Fan condenses all the relevant information into one nifty hands-on tool.
Use it to reinforce each element or principle as you introduce them throughout the year, or as a review at the start. Curate your spiral curriculum by adding pages each year as new content is learned. This way kids can quickly access these concepts right at their fingertips!
Features of This Interactive Fan Bundle
- Two, 51-page interactive fans with writing, drawing, and art history connections that students can build upon throughout the school year
- 2 versions of each fan, so you can decide how to introduce each art concept at your own pace and in your own way
- Completed teacher copy/answer keys for time-starved teachers that need to print-and-go. Hurrah!
- Two PowerPoint, with large scale and close-up images of all the artworks, so students can engage with them
- Easy, step-by-step assembly directions with pictures, so you don’t struggle explaining how to put it together
- Simple, clean design that enables students to focus on the task at hand
- Clear, crisp printing to make professional looking resources for your lessons
- Editable blank page, so you can create pages based on your own curriculum
How to Teach the Elements of Art and Principles of Design
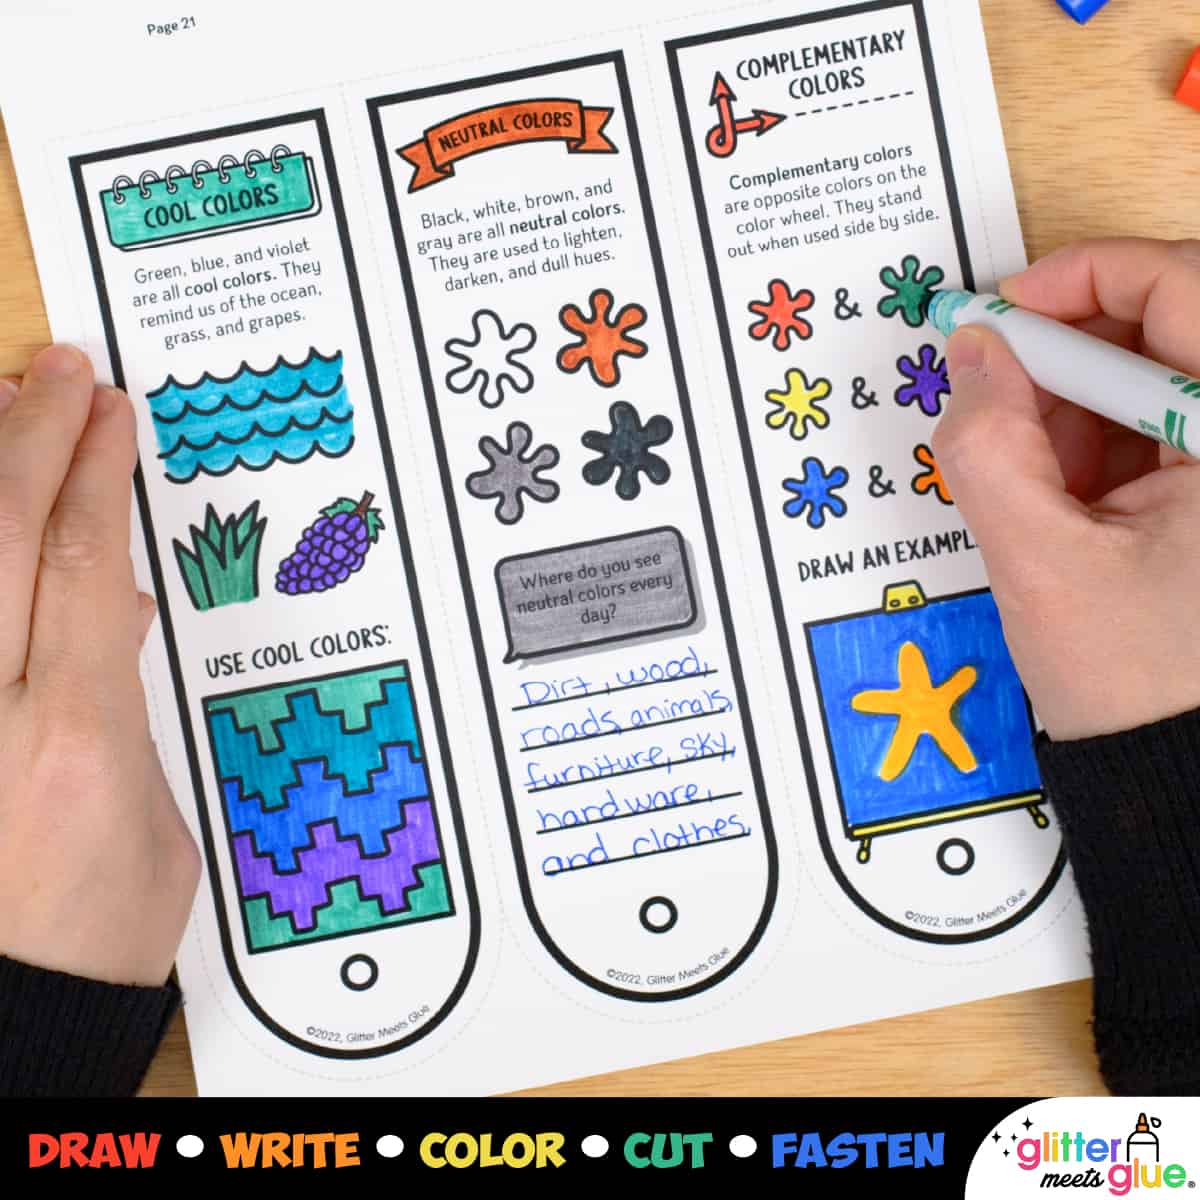
Each new element and principle begins with writing a basic definition. Then, they read a short blurb about an art concept and write answers to questions or demonstrate their knowledge by drawing or writing a definition. You don’t need to be an expert in any of this because the included answer key will guide you!
Here’s a general outline of the content covered with this interactive fan:
Elements of Art
- 5 Basic lines
- 8 Line varieties
- Calm vs. active lines
- Contour and gesture lines
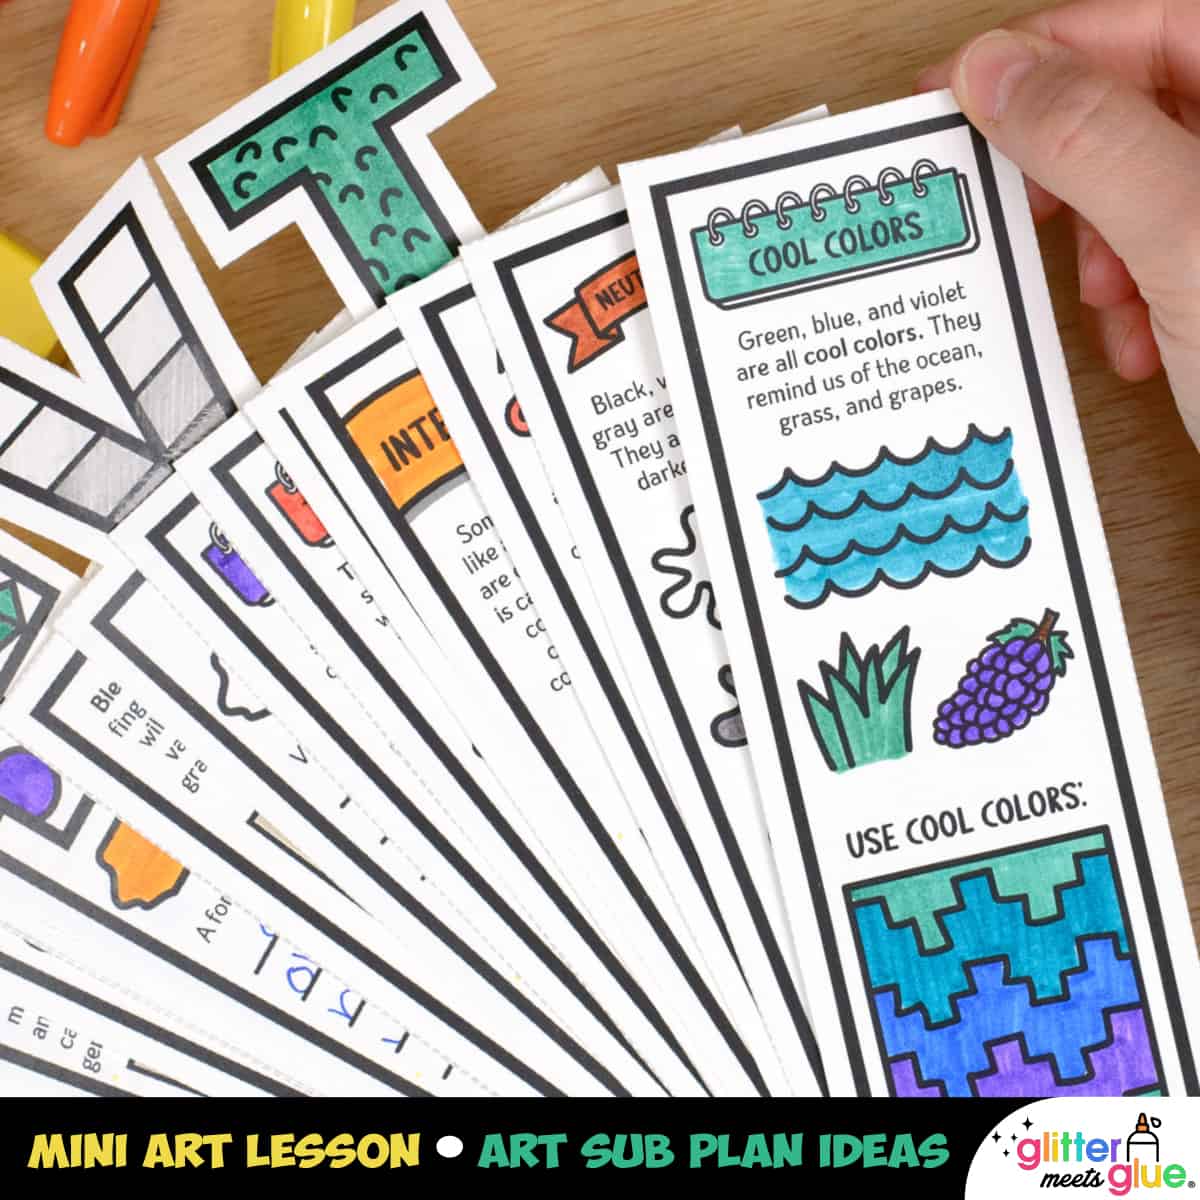
Color
- Primary, secondary, and tertiary colors
- Tints & shades
- Warm vs. cool colors
- Neutrals and intensity
- Complementary colors
- Monochromatic colors
Shape
- Geometric vs. free-form
- Organic shapes
Texture
- Tactile vs. Visual texture (real vs. implied)
Value
- Stippling, hatching, cross-hatching, and blending
- Value scale
Form
- Geometric vs. free-form forms
- Additive vs. subtractive sculpture
- Freestanding vs. kinetic sculpture
- Setting and public space
Space
- Positive vs. negative space
- 6 Ways to create depth (overlapping, changing size, placement, brightness/dullness, atmospheric perspective, and linear perspective)
- Foreground, middle ground, and background
Principles of Design
Balance
- Formal Balance
- Symmetry
- Approximate Symmetry
- Radial Symmetry
- Informal Balance (Asymmetry)
Contrast
Contrast through:
- Size
- Color
- Value
- Texture
- Line
Emphasis
Emphasis through:
- Location
- Placement (isolation)
Movement
- Diagonal Movement
- Curving Movement
- Repeating Lines
- Action Lines
- Kinetic Movement
Proportion
- Facial Proportion
- Body Proportion
- Scale
- Distortion
- Exaggeration
Pattern
- Pattern in Art
- Motifs
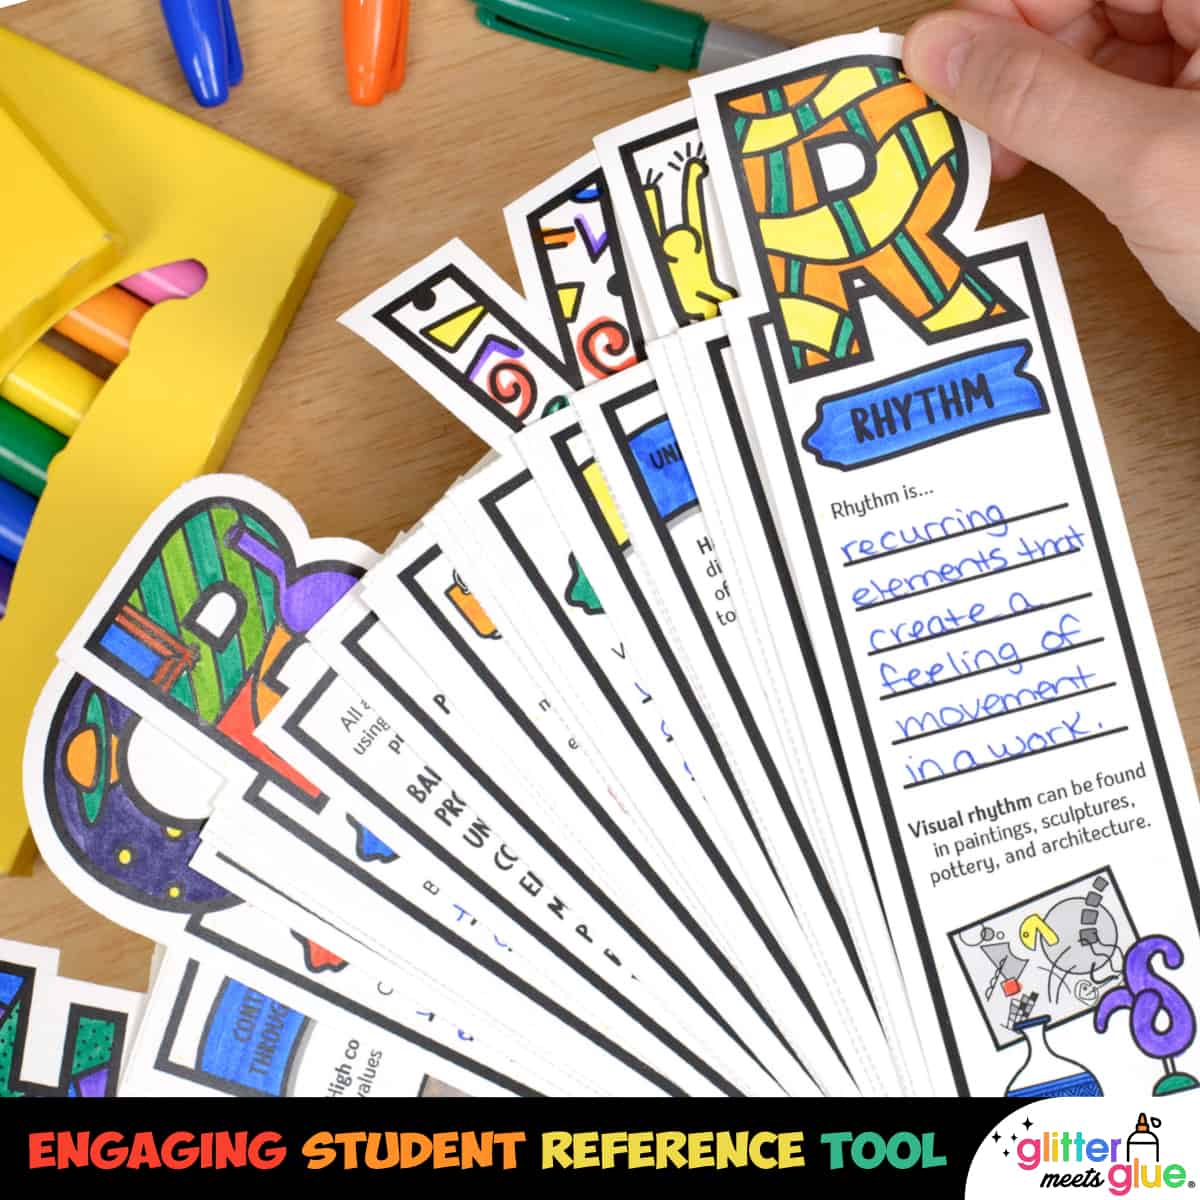
Rhythm
5 types of rhythm including:
- Regular
- Alternating
- Flowing
- Progressive
- Random
Unity
Unity through:
- Harmony
- Simplicity
- Media
- Theme
- Design
Variety
Variety through:
- Line
- Shape/Form
- Color
- Texture
- Value
Tools and Materials Needed
- Cardstock or Copy Paper
- 2.5” Book Binder Ring (or 2” metal brad). If you’re combining them all one one ring, I would suggest the largest binder ring you can find. If you intend on picking roughly half the pages from each deck, you can stick with the 2.5″ ring I’ve already suggested.
- Scissors
- Hole Puncher
- Coloring Materials (thin markers, crayons, and colored pencils)
- Pencils & Erasers
- Tempera Paint* (OPTIONAL, but not necessary at all – for any parts of the fan deck that involve color mixing)
You Will Receive
- 2 Non-Editable PDFs (Black and white student copy)
- 2 Non-Editable PDFs (Black and white student copy)
- 2 Non-Editable PowerPoint documents (Large-scale images of any art history artworks with a credit line for proper identification.)
- 2 Non-Editable PDFs (Full-color teacher copy/answer key.)
Why You’ll Love It
⭐️⭐️⭐️⭐️⭐️
This resource is a great go to when you have short weeks and need a fast mini lesson to get you through!
⭐️⭐️⭐️⭐️⭐️
Great resource for students to have. They are able to refer back to it when working in their projects.
⭐️⭐️⭐️⭐️⭐️
This has been one of my favorite additions to our art lessons. What a creative (and useful) product! Thank you!
Terms of Use
Please refer to my complete terms of use prior to purchasing.
The resource pack was very fitted to my pupils needs. Thank you.
This was great hands on experience. We are currently still working on it. The information is given in a fun interactive way that is not only enjoyable for he kids but for me as well!! Will definitely be using this resource again.
I am currently using this in my classroom as I introduce a new project this year. I have used part of this resource so far and I have to say that I love it and my students are excited about it too. They will have a resource that they can take with them to use in the next years. I love it. It is very helpful and a great tool for them as well as for me. Thanks so much!
I cannot love this product more! I am a new Fine Arts teacher in middle school and needed something to springboard and start the year- this has been AMAZING! Thank you!
This is a very cool way to teach elements and principles of art! The kids love the fan design.