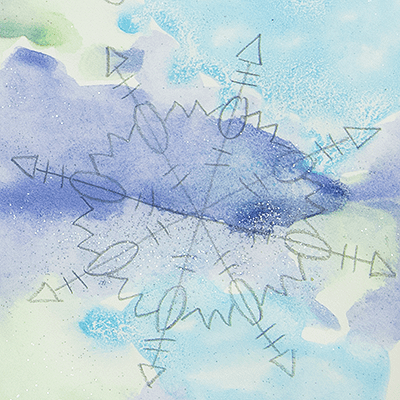
Need a quick and simple one-day art project for the last days in December or January? This is my favorite go-to kindergarten snowflake art lesson.
It reinforces prior knowledge about the 5 basic lines and geometric shapes they should know. It’s fun and simple. And it gives kindergarten a chance to play with glitter in a way that doesn’t make a mess!
Even better, it uses very few resources and is therefore cost effective for teachers.
If you’re a classroom teacher looking for some arts integration ideas, pair this with book “Snowflake Bentley.” This YouTube video has some great background information about Wilson A. Bentley, a man who snapped over 5,000 snowflake photographs.
Completion Time: 30 – 35 minutes
Snowflake Project Materials
- Heavy White Sulphite Drawing Paper
- Paintbrushes
- Glitter Mixing Medium (or fine glitter)
- Blue, Green, & Violet Liquid Watercolors (or watered down tempera paint)
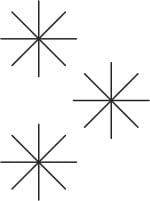
Download the Snowflake Tracer
Click here to download the tracer for this project.
Snowflake Art Lesson Step by Step Directions
Step One
First, trace the snowflakes onto a sheet of heavy drawing paper.

Step Two
Then have students generate a list of basic lines and shapes and demonstrate how to draw a them on one snowflake “arm:”

Step Three
Make each snowflake unique with different combinations of lines and shapes.

Step Four
Then mix either glitter mixing medium or fine glitter in with some liquid watercolor paints.


Step Five
Lastly, paint small areas of blue, green, and violet paint next to each other.


Look at how lovely!
When you see it in person, the tiny flecks of glitter sparkle so wonderfully. However, they don’t fall off the page and make a mess everywhere.
Snowflake Art Lesson

In case you were to think that this couldn’t possibly be doable for kinders, I promise you, they can! Check out my student’s artwork from this year.
The key is to get them to slow down the process. The more complicated they make the pattern, the more time they spend drawing it out. I start them out by drawing one shape on the end of the”arm.” Then, copy it on each “arm.”
Lastly add another line or shape below and copy it all the way around. Once they get the hang of one snowflake, they’re pretty much set for the rest.
You might be wondering why I trace the snowflakes for the students. The paper I use it thick, 90lb. paper and hard to see through. Also, their tracing isn’t spot-on yet.
And this isn’t the best project to practice that tracing. Each snowflake has to be a certain size to fit on the page; I’m more concerned about them drawing the shapes than I am about tracing.


If you liked this simple lesson, share it with others on your Pinterest!




Leave a Comment