As an art teacher, you’ve designed the perfect project, but now you’re stuck figuring out how to create an art rubric for grading your students’ artwork. You’re unsure of which criteria to include or how many performance levels to target. Don’t worry—I’ll walk you through it all step by step. By the end, you’ll be creating your own grading rubrics for elementary and middle school art projects with ease!
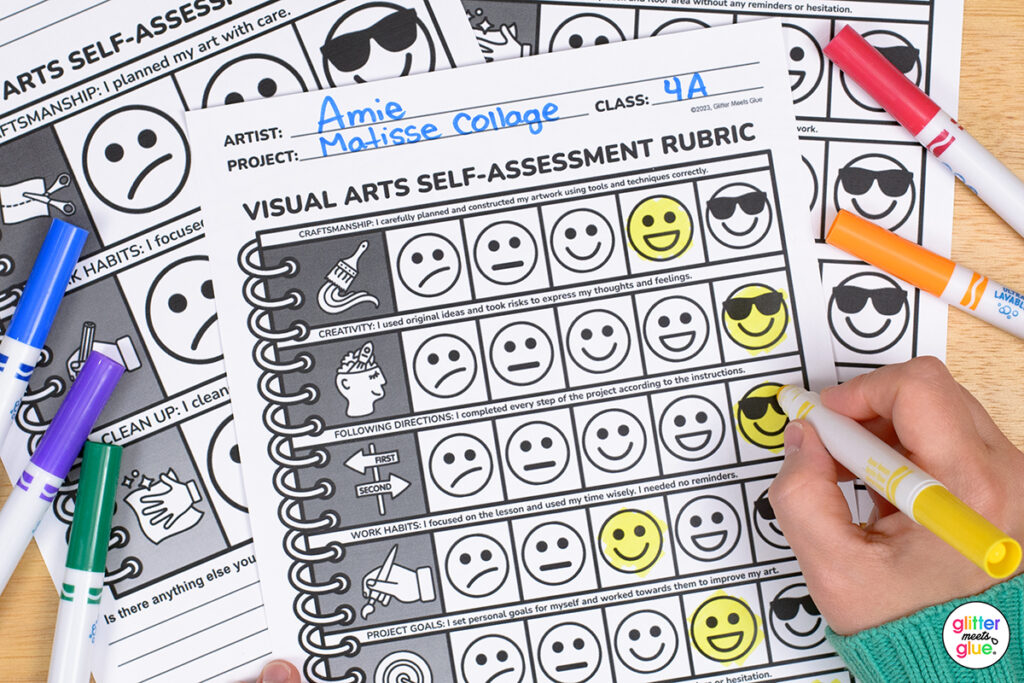
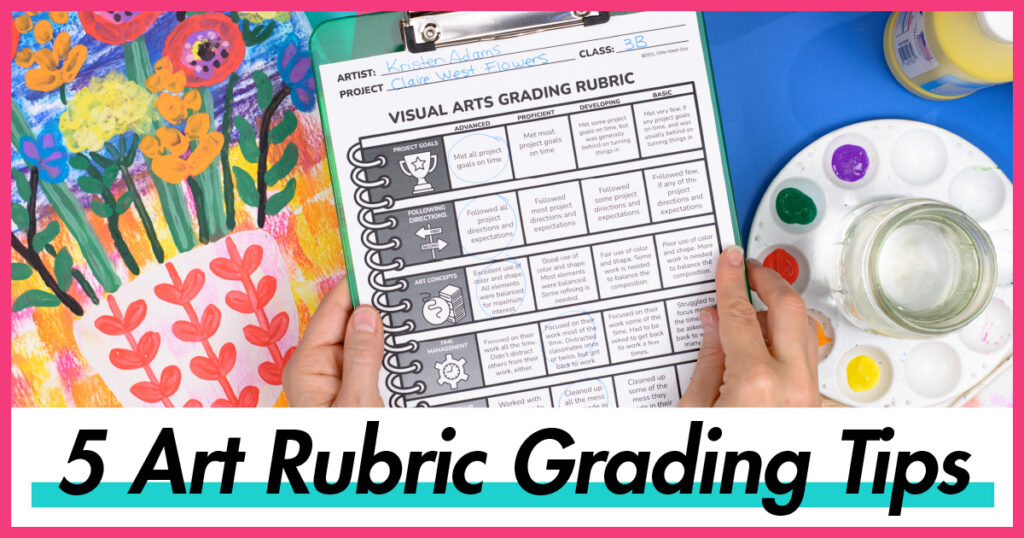
What is an Art Grading Rubric?
An art rubric is a scoring tool that defines specific criteria for evaluating a student’s artwork. Rubrics outline what you expect in areas like craftsmanship, art concepts, creativity, and completion of the project’s objectives. Unlike exit tickets, which serve as formative assessments, rubrics are used at the completion of a project.
Why Use Art Rubrics in Elementary and Middle School?
Grading artwork can be challenging due to their subjectivity, making it hard to assign fair scores that reflect students’ effort, creativity, and craftsmanship. Without a clear evaluation system, students and their parents may express distrust.
Art rubrics not only clarify expectations but also make grading artwork faster and more efficient. In large classes, grading can become overwhelming. Without clear rubrics, students or parents might question fairness, leading to frustration.
In my teaching career, I’ve managed anywhere from 80 to 950 students a year. If you spend just one minute per project, grading 600 students would take a staggering 10 hours!
A well-designed rubric simplifies grading.
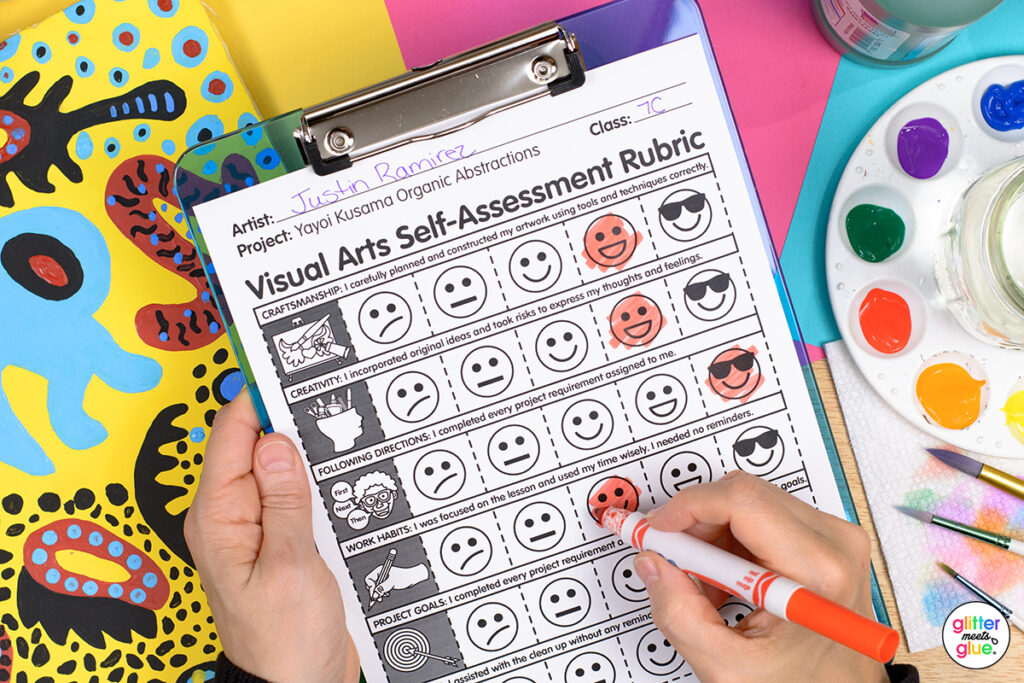
Lastly, art rubrics aren’t just for teachers! Have students use them to evaluate their own or a peer’s work. Using a self-assessment rubric for art projects builds critical thinking skills and encourages them to view their art more objectively.
How Can You Create Your Own Art Rubric?
Are you ready to create your first rubric? First, to design an effective grading rubric template for an art project, you’ll need to focus on 2 essential elements:
- Criteria (what you’re assessing)
- Performance Levels (the degree to which the criteria is met)
Let’s look at both.

Core Criteria for Grading Artwork
After reviewing numerous visual art rubrics for both elementary and middle school, here’s a list of all the most common criteria. And some thoughts on how myself, and other art teachers, use them in assessments:
- Art Concepts
- Clean Up
- Craftsmanship
- Creativity
- Completeness
- Focus, Time Management, or Work Habits
- Following Directions and Expectations
- Project Goals
- Safety
Art Concepts
This criterion refers to the elements of art and principles of design. Your rubric may target a specific element or principle, or address them in general. For instance, if your lesson focuses on analogous colors, you’ll want to assess whether students effectively incorporated these colors into their projects.
Clean Up
This one’s pretty self-explanatory. For art teachers using the Studio Habits of Mind framework, assessing cleanup can be particularly significant. That’s because taking care of tools and materials is a function of being an artist, which is what the Studio Habits strive to teach.
In my art room, I emphasize teamwork with the motto, “If you make the mess, you help clean it up.” Consider whether students participated in cleaning up their workspace and offered assistance to their peers.
Craftsmanship
Craftsmanship refers to the neatness and skill demonstrated in using art materials, often described as media skills. You may be assessing either direct or indirect media skill acquisition.
In painting lessons, craftsmanship might involve how students control their brushstrokes, while in drawing, it could focus on shading techniques.
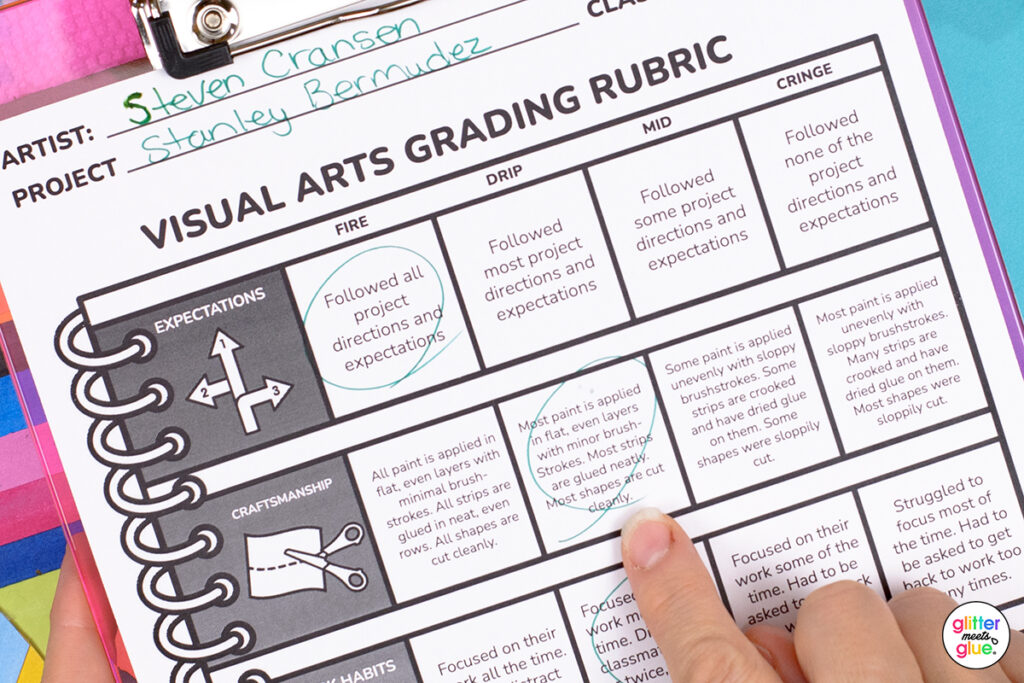
It’s also essential to consider students’ Individualized Education Programs (IEPs) and how they might impact grading. Be aware of which students have IEPs and the physical challenges they may face that could affect their craftsmanship skills. Adjust your expectations accordingly to ensure a fair and equitable assessment.
Creativity
Every art lesson presents a problem to solve, and each student should approach that problem in their own unique way.
I typically avoid showing numerous example projects—sometimes opting not to show any at all—because students often perceive these as “the right answer” and may resort to copying. Some may also copy their peers, making originality harder to trace.
Instead, we focus on discussing how to take inspiration from existing ideas and combine or refine them to create something original. This process of exploration and personal expression is what I assess in their work.
Completeness
Ideally, projects should be finished to their logical conclusion. However, there are instances when they may inadvertently extend into another marking period outside of your control. In such cases, I assess the project based on the amount of work completed relative to the expectations for that marking period.
Focus, Time Management, or Work Habits
All 3 of these are closely related concepts in the art classroom. If you’re using the Studio Habits of Mind, you can target the habit called, “Engage and Persist” in your lessons.
Regardless, all of these concepts basically refer to “time on task.” It’s essential to assess if your students dedicated their entire class period to their project. Or did they spend all period in off-topic conversations?
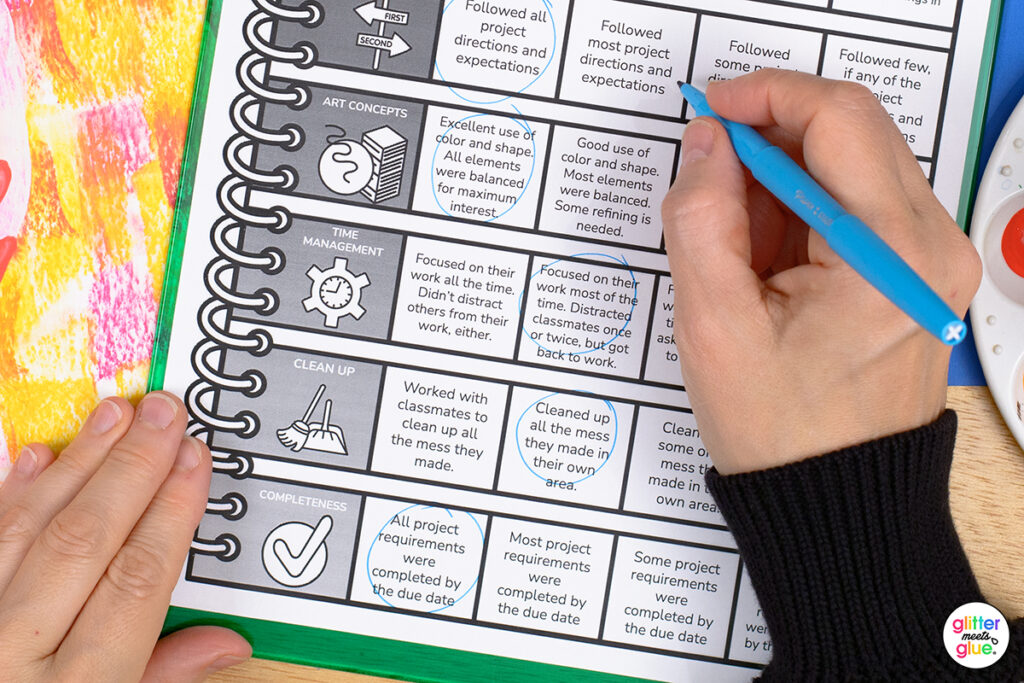
It’s important to clarify that time management is not assessing a student’s behavior. The goal is to evaluate whether students are actively working on and discussing their projects. Any specific, off-task comments should not factor into this assessment (see Tip #2 for more on this).
Following Directions and Expectations
This criterion assesses a student’s ability to observe, listen, read, and execute demonstrated instructions.
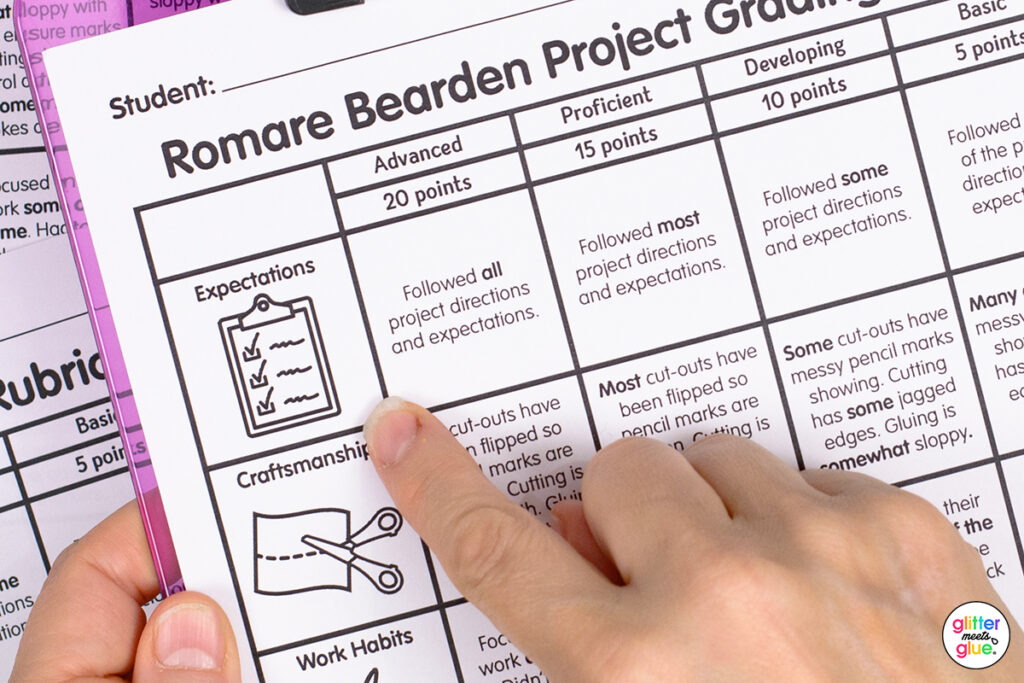
Some students may excel at grasping the steps conceptually but struggle to apply them due to limited creativity or media skills. I firmly believe that assessing how well my students can follow directions, I’m able to better credit their learning process (i.e. they understand the steps to making a reductive print), even if their final project isn’t aesthetically pleasing.
Project Goals
Project goals are the learning objectives or skills students are expected to achieve by the end of an assignment. These objectives align with your lesson plan and may emphasize artistic techniques, conceptual understanding, or personal expression.
Project goals can also involve smaller, supporting tasks—like sketchbook drawings, brainstorming exercises, or worksheets—that help students develop their ideas and meet the overall assignment requirements.
Safety
Some art projects involve materials or tools that require careful handling, such as special inks, dyes, or sharp tools. In these cases, it’s helpful to assess students’ adherence to safety guidelines as part of the art rubric.
For example, when working with plaster in 4th and 5th grade, I emphasize the rule, “Don’t blow the dust.” Plaster dust is harmful if inhaled, especially for students with respiratory conditions. By assessing safety, you promote responsible behavior, ensuring a safer environment for all students.
Art Rubric Performance Levels
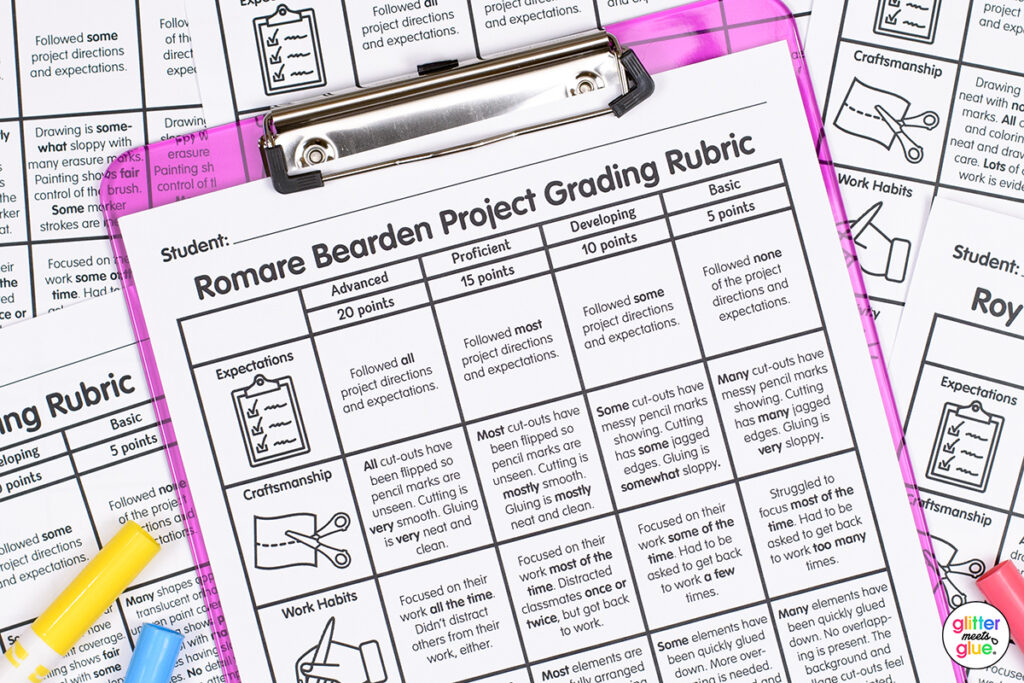
Decide whether you want to assign points (e.g., 1-4), use descriptive levels (e.g., “Exceeds Expectations” vs. “Needs Improvement”), or a combination of both.
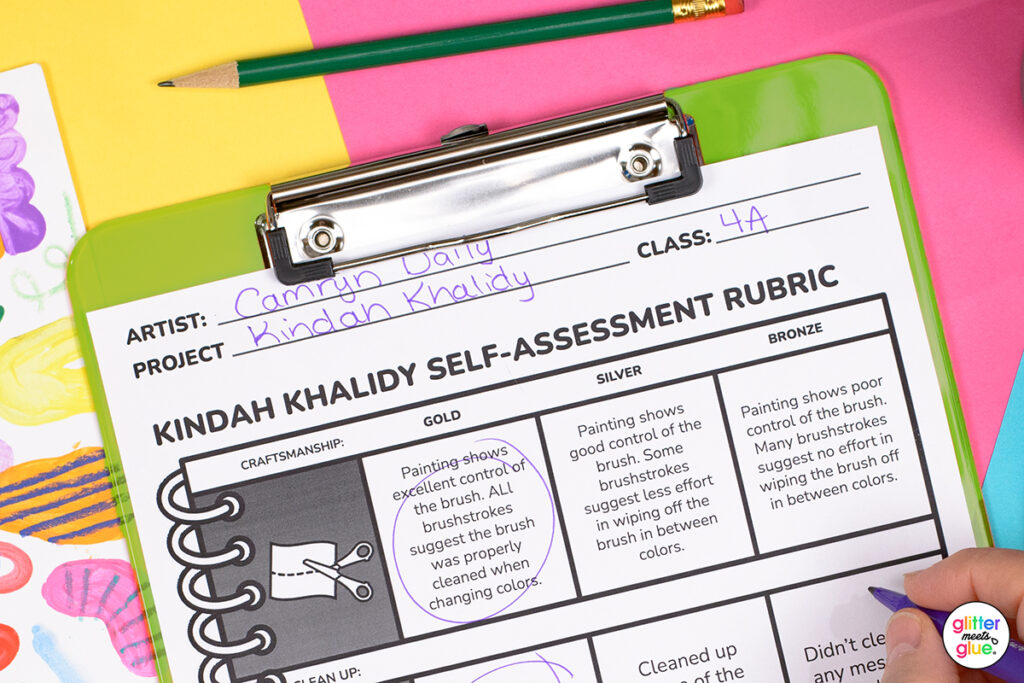
As far as how to label them, some examples might include:
- Exceeds… / Meets… / Approaches… / Missed Expectations
- Advanced / Proficient / Basic / In-Progress
- Extraordinary / Above Average / Average / Below Average / Poor
- Excellent / Good / Fair / Poor
- Outstanding / Satisfactory / Needs Improvement / Unsatisfactory
- Mastery / Developing / Emerging / Beginning
- Expert / Apprentice / Novice
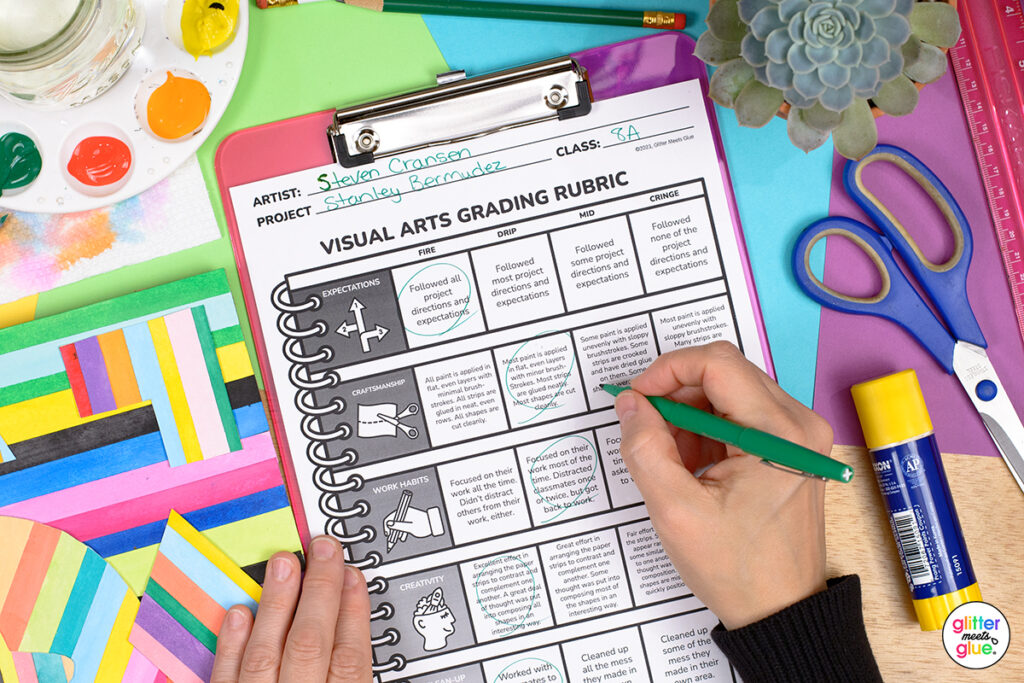
Of course, if you want to appeal to the Gen Z and Gen A crowd with playful language, you could go with:
- Fire / Drip / Mid / Cringe
- Lit / Vibe / Chill / Sus
For the youngest learners, these might be engaging:
- Rockstar / Solid / Getting There / Not Yet
- Gold / Silver / Bronze / Try Again
- Wow! / Nice Work / Keep Going / Needs More
I would stick with 3 levels for lower elementary, and 4 – 5 levels for 3rd grade and up. Any of the ideas above can be reduced to just 3 performance levels.
5 Art Rubric Grading Tips for Student Artwork Assessment
Now that you have an idea of what’s included on an art rubric, here are some additional thoughts on creating them.
1. Keep It Simple for Lower Elementary
- For young learners, minimize the text. Use straightforward criteria labels like craftsmanship, creativity, and clean-up, but skip lengthy definitions or criteria descriptions.
- Limit your rubric to 3-4 criteria with a matching number of performance indicators.
- For upper elementary and middle school, you can include more text. But keep the language simple and concise.
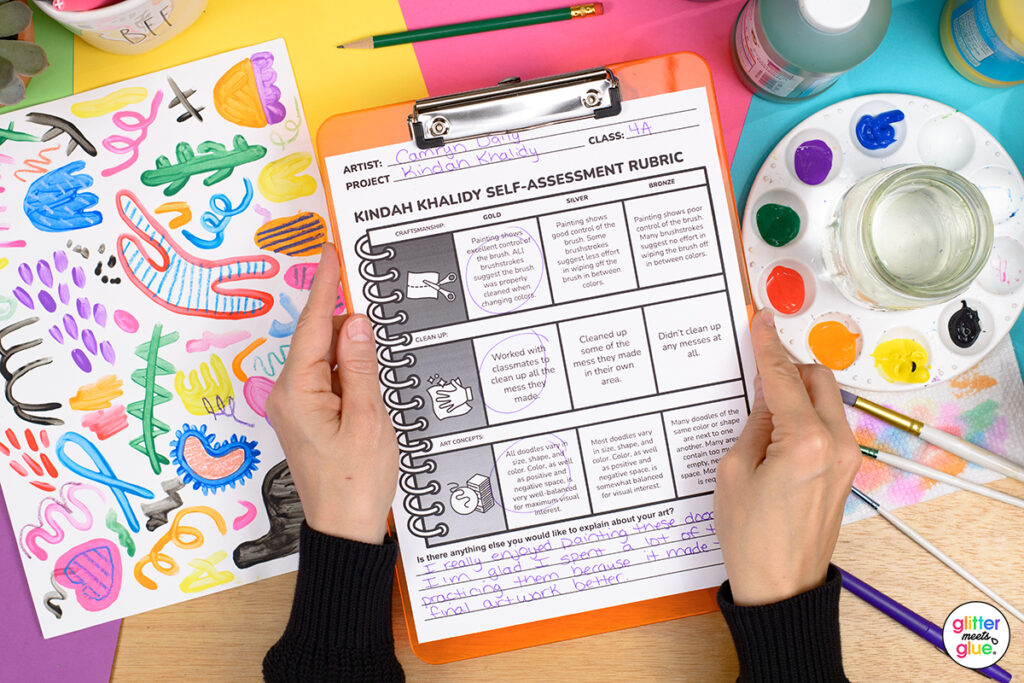
Today’s students (and let’s be honest, most of us) are content scanners. When you landed on this page, did you quickly scan for the key parts?
Students do the same. More text doesn’t equate to better understanding, especially if it includes unfamiliar terminology that hasn’t been explicitly taught. Aim for short, clear, and easily interpretable content.
2. Kick Behavior Criteria to the Curb
Including behavior on an art evaluation rubric is an outdated practice. Behavior should not affect an art grade because it:
- Unfairly penalizes them for non-academic issues
- Doesn’t reflect what they’ve learned or the skills they’ve developed
Even more concerning, students with ADHD, autism, anxiety, or other challenges may struggle with behaviors that have nothing to do with their artistic abilities. Penalizing them for these behaviors creates unnecessary barriers and fails to promote a fair learning environment.
3. Leave Room for Comments
Whenever possible, include space on your rubric for written comments. Constructive feedback is essential for student growth and helps students understand what they can focus on improving in future projects.
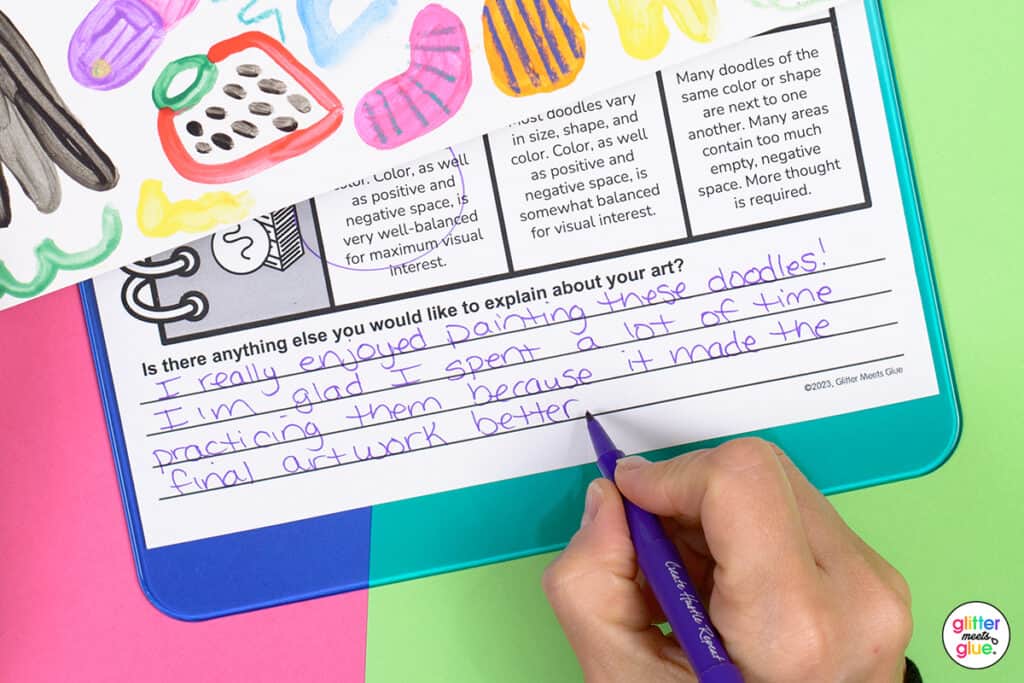
For self-assessment rubrics, it’s equally important to provide space for students to reflect on their work. This allows them to share additional thoughts, insights, or context that might not be captured by the rubric alone.
I use a question such as, “Is there anything else you would like to explain about your art?”
4. Use Engaging Visuals
It’s art class, after all—so why not incorporate clear, engaging visuals into your grading rubrics?
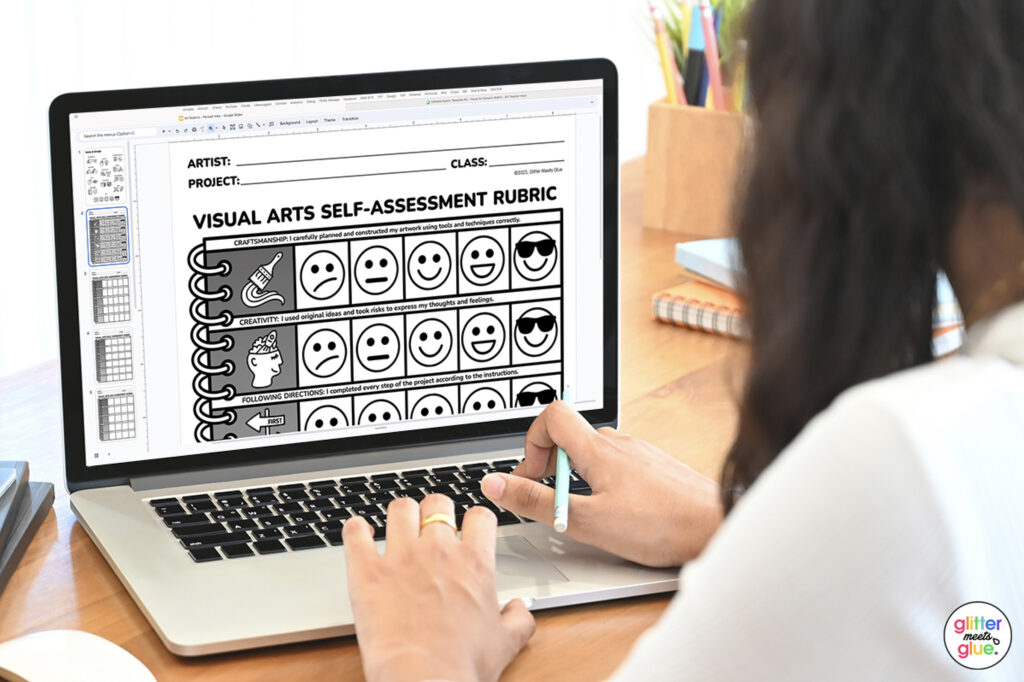
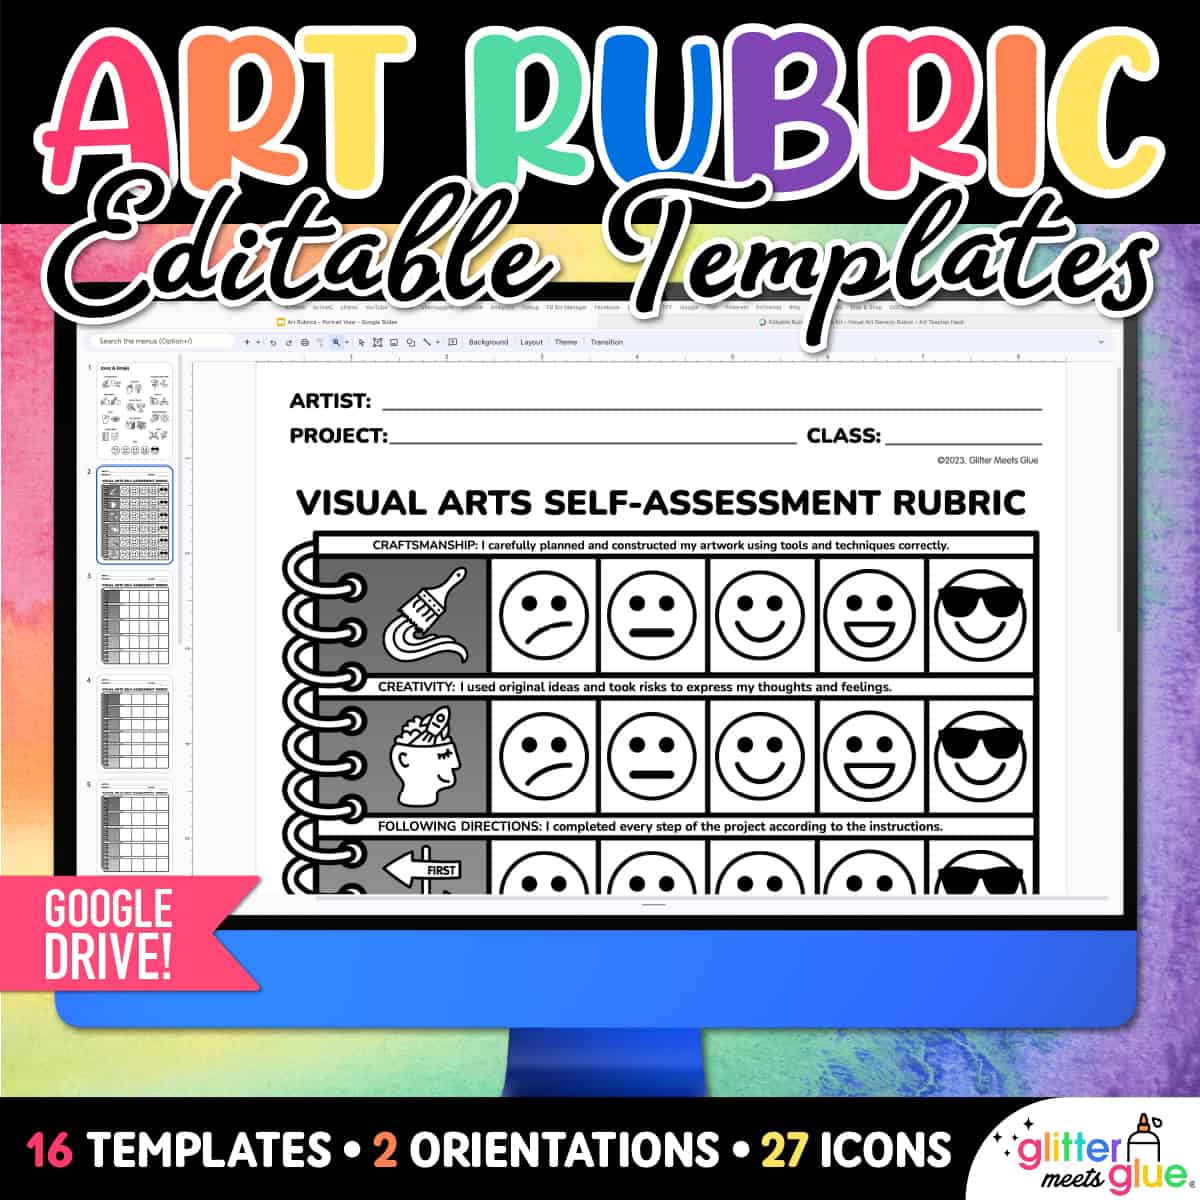
- For younger grades, consider using emojis exclusively to represent performance levels. Emojis provide a quick, intuitive way for students to understand abstract concepts. Young children, emerging readers, or students with language challenges (like English language learners) can struggle with text-heavy rubrics. Emojis bridge that gap by making expectations easy to grasp and accessible for everyone.
- For all grade levels, include icons to represent each criterion on the rubric. Just like emojis, icons help convey meaning at a glance and reduce cognitive load, allowing students to focus on their work instead of decoding complex language.
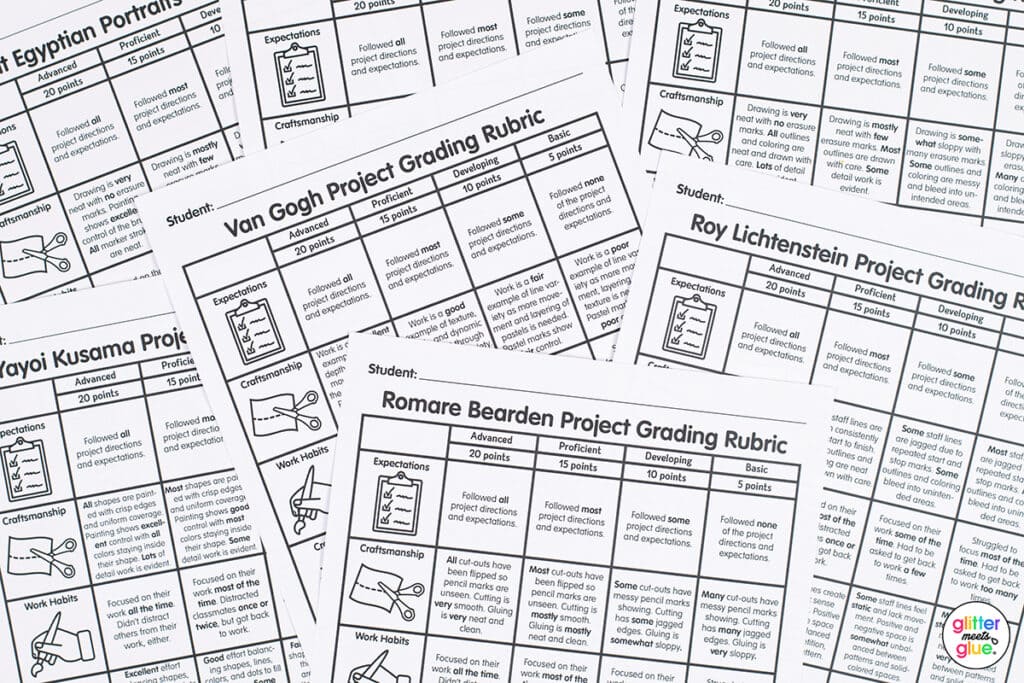
Bonus tip: Use the same icons throughout your art room—on posters, handouts, and homework assignments—to create consistency and reinforce expectations. Familiar visuals help students feel more comfortable and confident navigating different tasks.
5. Set Clear Expectations from the Start
At the beginning of the lesson, review the rubric with your students. This ensures they understand what’s expected before they even start the project.
For challenging middle school classes, I have students bring the rubric home to get it signed and returned for a homework grade. This not only reinforces accountability but also encourages parent communication. If your evaluation includes parent engagement, this strategy can count toward meeting that goal, too!
Ready to Save Time on Creating Art Rubrics?
If you’d like to save time creating rubrics from scratch, my Editable Art Rubric Template is a great place to start! It’s customizable to fit any art project and makes grading artwork a breeze.
Final Thoughts
Grading artwork doesn’t have to be complicated or subjective. A clear and simple art rubric helps you assess projects fairly, communicate expectations, and make evaluating art projects more efficient. Whether you use my editable template or design your own, these tips will ensure your students feel supported and understood.
Have any questions on anything I didn’t cover? Drop a comment below and I’ll reply.



Leave a Comment